Wednesday, September 26, 2012

Farewell to Peaches and Souffles at Last!


I think that the title of this post pretty much says it all. Alas, recently when I was at the grower's market, I was told that it would be the last time I could buy peaches from my favorite vendor. The absence of peaches for me is really one of the only downsides of autumn in terms of produce availability ( I have already exclaimed about them enough). So naturally I had to find a way to make these golden beauties memorable.


It is about time that I made souffles, don't you think? So here you have it- Peach Sunlight Souffles-the perfect way to showcase the last peaches of the season. Ironically, considering the name of my blog, this was the first time I have ever made souffles. But I guess I got lucky, because they turned out just as they were supposed to- airy, light and tasty :)


I used a recipe from a fantastic cookbook called Mollie Katzen's Sunlight Cafe. She gives lots if tips for making souffles, one of which is using the freshest eggs possible. I am lucky to have two hens- Persephone and Ophelia- for this matter :) My goal is to make at least one souffle a month (I am already excited about the kind I am planning on making in October!)


Lately I have really cherished being able to spend time outside in nature, riding my bike or just walking along the ditch banks. Every day I get to see the changes taking place. I am alarmed at how quickly summer flew by, but I love autumn so much that it is hard for me to not accept its arrival with open arms.


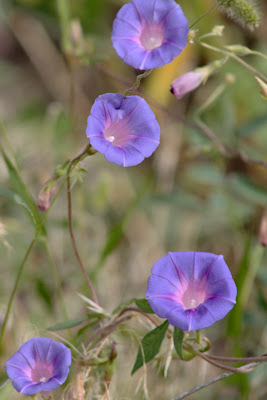
In the cool dawning of the day I pass patches of blue morning glories, apple groves of trees heavy with burgundy fruit and pyracantha bushes with their bright orange berries. Fallen leaves skim the surface of the water in the ditch and raccoon tracks are evident in the dark clay. Deep red creepers climb the tallest cottonwood trees, up into the branches where the woodpecker is hammering away. The slightest bit of sunny yellow shows on the tips of the cottonwood leaves.


I realize how lucky I am to be able to experience these little lovely things. As I am working, through the open window I hear the Canada Geese flying overhead, and I know it will not be long before the elegant Sandhill Cranes arrive to spend the winter. At night there is a crisp new freshness to the air. I feel it would not be right not to acknowledge these changes, as they only happen once between the passing of seasons.


Peach Sunlight Souffles
makes 4 individual souffles or a single souffle in a 1 1/2- quart dish

Nonstick spray
2 cups ricotta
6 large eggs, separated and at room temperature
2 teaspoons vanilla extract
1/4 teaspoon almond extract
6 tablespoons Jeanne's All Purpose Gluten Free Flour Blend (see Lavender Peach Crostada post)
1/2 teaspoon salt
1/4 cup sugar
1 tablespoon grated lemon zest
2 medium-sized ripe peaches, peeled and sliced
2 teaspoons fresh lemon juice

1. Preheat the oven to 375 degrees F. Lightly spray a 1 1/2- quart souffle dish or 4 ramekins with nonstick spray.
2. Place the ricotta in a large bowl and add the egg yolks, extracts, flour blend, salt, sugar, and lemon zest. Whisk together until fluffy and smooth.
3. Beat the egg whites until they form peaks that don't fall over when the whisk or beaters are lifted and just a little liquid is left in the bottom of the bowl.
4. Fold the beaten whites into the ricotta mixture until they are mostly incorporated. The mixture will not be uniform- there will be little puffs of "cloud" here and there- and that is fine. (It is best not to over fold, as this will deflate the egg whites.) Transfer the mixture to the prepared dish or dishes.
5. Toss together the peach slices and the lemon juice, then arrange the peaches in a design on top of the souffle.
6. Bake in the center of the oven for 25-45 minutes (depending on if you used a single dish or 4 smaller ramekins) or until the souffle seems solid when you gently shake the dish. Serve immediately.


Recipe slightly adapted from Mollie Katzen's Sunlight Cafe

Sunday, September 23, 2012

Of Figs, Honey, and Blood Orange Gelato


It is a bit ironic that the first day of autumn I am posting recipes that seem rather summery and combine flavors that may be reminiscent of the sapphire sunny beaches of the Mediterranean. But I don't feel too bad about splurging on some "exotic" non-local ingredients once in a while as long as I balance them out with a few items from the regional bounty.


Right now there are figs everywhere- Black Mission, Brown Turkey and Green Kadota. I have been in love with them ever since I discovered an ancient fig tree bursting with the alien looking fruit in a friend's garden. In this meal, I wanted to showcase them in a salad with other Mediterranean flavors. My favorite salad dressing at the moment has to be a simple lemon infused olive oil and fresh lemon juice. It is so bright and it brings out all the other flavors in the salad.


I was also excited to try Halloumi again. Halloumi is a cheese that comes from Cyprus and is made from either goat's, sheep's, or occasionally cow's milk. It is very salty and is usually grilled or pan- fried. I decided to keep it simple by serving it alone drizzled with local honey and fresh mint from our garden (mint is pretty much the only green edible plant we can successfully grow abundantly). The saltiness of the cheese and sweetness of the honey balanced out really nicely.


Finally for the last savory dish of this meal, I wanted to make one of my favorite Greek inspired foods- Dolmades. I was glad to find a fantastic recipe in an old Saveur magazine that was vegetarian. The recipe makes extra but you can save them for several days- and trust me, you will want them for several days :)


And now for the gelato. It is one of my great dreams to travel to the Almalfi coast or somewhere in the region to visit the beautiful citrus groves. I always see pictures of dark canopies of trees laden with bright orange, red and yellow fruit. I wanted the blood orange gelato to be reminiscent of the orange trees that I have become so familiar with through photographs.


I was just a little bit disappointed that the scarlet color of the blood oranges did not come out in the gelato. But nevertheless, the finished product was still pretty and delicious.

If you are like me, you take comfort in dreaming about beautiful, wonderful places. The dreaming about it is at least partly as satisfying as the real thing :) and maybe just maybe, in the future I will get to travel to see the azure blue ocean and land of incredible flavor, culture and art.


Fig and Baby Green "Mediterranean" Salad
Serves 4

1 bunch of asparagus, trimmed
olive oil for drizzling
salt for seasoning
1 cup baby Swiss chard
1 cup arugula
1 cup spinach
8 ripe figs, halved
20-24 marinated olives
2 tablespoons capers
2 tablespoons freshly squeezed lemon juice
4 tablespoons lemon olive oil

1. Set oven temperature to 400 degrees F. Spread out asparagus on a rimmed baking sheet in a single layer. Drizzle with olive oil and sprinkle with salt. Place sheet in the oven and cook for 15 to 20 minutes, tossing asparagus once or twice, until tender and starting to char.
2. Toss together the baby greens, fig halves, olives and capers.
3. Whisk together the lemon juice and olive oil. Place the asparagus on top of the salad and dress with the lemon dressing.


Recipe from the kitchen of Cirque Du Souffle :)


Dolmades (Stuffed Grape Leaves)
makes about 16

2 tablespoons plus 2 tsp. extra-virgin olive oil
2 tablespoons minced fennel
1 clove garlic, minced
1/4 medium red onion, minced
1/4 cup basmati rice
salt and pepper for seasoning
1/4 teaspoon ground cumin
2 tablespoons minced fresh dill
2 tablespoons minced fresh parsley
2 tablespoons minced fresh mint
16 grape leaves in brine, drained plus 4 grape leaves
2 tablespoons fresh lemon juice

1. Heat 1 tablespoon oil in a 12 inch skillet over medium- high heat. Add fennel, garlic, and onions; cook until soft, 3-4 minutes. Add rice; toast for 3 minutes. Add cumin and 3/4 cup water; season with salt and pepper. Boil; reduce heat to medium- low and simmer until rice has absorbed water, 12-15 minutes. Stir in 2 teaspoons oil along with dill, parsley, and mint. Let cool slightly.
2. Coat bottom of a 3-quart saucepan with remaining oil and 1 tablespoon plus 2 teaspoons water; cover with 4 grape leaves. Set remaining grape leaves on a work surface, vein side up. Working with one leaf at a time, flatten leaf and place about 1 1/2 teaspoons rice mixture in center. Fold bottom of leaf over filling, fold in sides, and roll tight cylinder. Transfer, seam side down, to pot. Repeat.
3. Add lemon juice and 1/2 cup water to pot. Cover grape leaves with a small plate to keep submerged; bring to a boil. Reduce heat to medium-low; simmer until rice filling is tender, 15-20 minutes. Serve hot or cold.


Adapted slightly from Saveur's August/ September 2010 issue


Blood Orange Gelato in Sugared Orange Peels
makes 4 gelato filled oranges plus 1 pint

4 large blood oranges
3- 4 cups granulated sugar
6-8 cups water
coarse sugar

1 tablespoon orange zest
2/3 cup plus 1 teaspoon sugar
2/3 cup water
1/4 cup freshly squeezed lemon juice
2/3 cup heavy whipping cream

1. Cut the tops off of the blood oranges. With a spoon or a melon baller, scoop out the insides of the oranges, leaving a clean round orange peel "cup" intact. After you empty the orange peels cups, place the orange insides in a bowl and set aside.
2. Fill a large sauce pan with enough water to cover the orange peel cups (6-8 cups) and stir in sugar (3-4 cups). Bring the sugar water to a boil until the sugar is completely dissolved. Reduce the heat to a simmer and submerge the orange peel cups in the sugar water. Simmer for about 10 minutes, until orange peels are slightly tender and sticky. Turn off the heat, take the orange peel cups out of the water, and set to cool completely on a wire rack.
3. While orange peels cups are cooling, place the insides of the blood oranges in a juicer machine. After juicing, you should have about 2 cups of blood orange juice.
4. In a small bowl mash the orange zest with 1 teaspoon of the sugar to release the oils.
5. Prepare an ice bath by filling a large bowl or pan with ice and water.
6. In a medium saucepan, mix together the remaining 2/3 cup of sugar and 2/3 cup water and bring to a boil, stirring to dissolve the sugar. Cook until the sugar is clear and then take off of the heat and stir in the blood orange juice, lemon juice, and sugared zest. Immediately place the saucepan in the ice bath. Stir the mixture occasionally until it cools to room temperature.
7. Transfer to a container and stir in the cream. Cover and refrigerate until thoroughly chilled, a minimum of 3 hours, preferably overnight.
8. While the gelato mixture cools, prepare the orange peel cups. When they are cool they should be sticky. Place them on a small pan or cookie sheet and spoon coarse sugar over them. Keep sprinkling sugar until the desired amount sticks to the peel. Place the sheet in the freezer and freeze until ready to fill.
9. When the gelato mixture is ready, pour it into an ice cream maker and freeze according to manufacturer's instructions. Take the orange peel cups out of the freezer and spoon the gelato into each. Return the gelato filled blood orange cups to the freezer until ready to serve. Garnish with sprigs of mint.


Gelato recipe from Christine of On This Side of Eternity

Orange peel "cup" recipe from the kitchen of Cirque Du Souffle :)


Thursday, September 20, 2012

Birthday Cupcakes (GF)


I had never tried a white peach before. Then I tasted Urban Orchards white peach sauce. The golden sauce was so good that I just had to use it in a recipe. I knew that it would add the perfect touch of brightness to a traditional dark chocolate cupcake with buttercream, hence these tasty treats.


I had seen white peaches at the farmer's market for about a month, but for some reason I always went for the yellow plump juicy peaches that I was so familiar with. But after I made the cupcakes I looked everywhere for white peaches- alas I was too late :( Their pale pink fuzzy skin and creamy fruit is so beautiful, I wanted to be able to photograph one. But since I missed my opportunity, I decided to draw them instead. I realized that it is hard to capture their beauty and delicious quality with colored pencils and paper.


Although I am still trying to perfect this "magic" buttercream, the overall outcome was very tasty. The cake was moist but light, the buttercream fluffy, and the sauce... well I have already told you how much I love the sauce.


Chocolate Cupcakes with Magic Buttercream Drizzled with White Peach Sauce (GF)
makes 8 jumbo cupcakes


Chocolate Cupcakes

2 cups Jeanne's All Purpose Gluten Free Flour Blend (see Lavender Peach Crostada post)
1 teaspoon baking soda
1 teaspoon baking powder
1 cup boiling water
3 ounces unsweetened chocolate, chopped
8 tablespoons (1 stick) unsalted butter, cut into pieces
1 teaspoon vanilla extract
2 cups sugar
2 large eggs
1/2 cup sour cream

1. Preheat oven to 350 degrees F. Set 8 jumbo cupcake liners in a cupcake tin or 8 jumbo baking cups on top of a baking sheet.
2. In a small bowl, whisk together flour blend, baking soda and baking powder. Set aside.
3. Place unsweetened chocolate and butter in a medium bowl. Pour boiling water over, and let sit for 1 minute until it is completely melted. Whisk to combine.
4. Break eggs into the bowl of a mixer, beat on high until foamy. Add sugar and continue to beat until peaks form. Mix in the vanilla.
5. Add the butter-chocolate mixture, beat on high to combine. Then add the sour cream, mix again to combine. And finally add the flour mixture, mixing until just combined (don't over mix).
6. Distribute the batter evenly between the 8 cupcake cups. Bake for about 50 minutes (until toothpick inserted comes out clean). Let cool on baking sheet for 10 minutes, then place on a wire rack.


Recipe from Jeanne Sauvage's Art of Gluten- Free Baking (Chocolate cake recipe)


Magic Buttercream

2/3 cup granulated sugar
2 egg whites
1 1/2 cups (3 sticks) unsalted butter, at room temperature, cut into 2 inch chunks
1 2/3 cups confectioners' sugar
1/4 teaspoon salt
2 tablespoons milk

1. In a small heatproof bowl, whisk together the granulated sugar and egg whites to make a thick slurry. Place the bowl over (not touching) simmering water in a saucepan and heat, whisking occasionally, for 3 to 5 minutes, or until the mixture is hot to the touch. It will thin out a bit as the sugar melts.
2. Remove from the heat and scrape the mixture into the bowl of a stand mixer or hand mixer fitted with a whip attachment. Whip on medium-high speed for 6 to 8 minutes, or until the mixture becomes a light, white meringue and is cool to the touch.
3. Turn down the speed to medium, add the butter, a few chunks at a time, and beat for 3 to 4 minutes, or until the butter is thoroughly incorporated. Add the confectioners' sugar, salt, milk, and vanilla and continue to beat on medium speed until the mixture is smooth and satiny.
4. To frost cupcakes, Fit a pastry bag with a small star tip and fill the bag with the frosting. Then pipe the frosting onto the cupcakes. (Can store the frosted cupcakes in an airtight container at room temperature for up to 2 days).


Recipe from Flour by Joanne Chang


Right before eating the cupcakes, drizzle with a thin fruit jam, syrup, or sauce, for an extra bright flavor boost :)

Wednesday, September 12, 2012

Savory Apple Hand Pies, Sunflowers, A Taste of Autumn


Autumn is lurking around the corner. The crisp evenings and mornings are here. The deep blue light in the late afternoon. The chilly breeze. The creepers and vines beginning to turn crimson. It is nearly time, and I am so excited.


When you think about Autumn, what is one of the first produce items you think of? Apples of course! Their crispness, their contrast of sweetness and tartness, seem to portray the essence of Fall.

I personally have fond memories of traveling with my family every year to a little apple farm called Dixon in the heart of the Cochiti Canyon. At this time of year the owners welcomed the public to a piece of their orchard. Rustic wooden bins filled to the brim with a rainbow of apples, spiced cider, music, and the smell of apple fritters wafting through the cool air- it is all very nostalgic.

Sadly, however, the fairly recent Las Conchas wildfire along with the severe flooding that followed, destroyed the orchards at Dixon :(

 I do miss their tart champagne apples, but I am now trying to broaden my familiarity with as many apple varieties that I can find :)


I was really surprised when I first cut into a pink pearl apple. I found it hard to believe that the vibrant color was natural.

Apples are one of the most apparent examples of the rapidly decreasing diversity in modern day agricultural practice. In the year 1900 we still had about 7,100 varieties of apples in the United States. Today we only have about 1000 of those varieties. The rest are extinct. That is why it is so special when farmers grow heritage varieties that are rarely seen. They are keeping an entire species of apple alive that is as unique and beautiful as the pink pearl apple in the photograph above.


As for the hand pies, I decided that the flavors of the tart pink apples, sweet caramelized onion, fragrant thyme, and salty sharp white cheddar would all be perfectly autumn-y together.


At this moment in September the sunflowers that line the ditches are in full bloom. They are just stunning against the dark blue stormy sky that we have had for the past few days. I couldn't help sharing some photos.


This hand pies are great for breakfast, lunch or dinner :) If you can't find pink pearl apples, use another tart variety like granny smith.


By the way, did you know that the origin of the apple is Kazakhstan? That was the first place that Russian botanist Nicolai Vavilov trekked to find the wild ancestors that he would store in the first ever international seed bank.


Pink Pearl Apple and Sharp White Cheddar Hand Pies (GF)
makes four 4 1/2 inch round pies or eight crescent pies


Pie Crust

1 1/2 cups Artisan Gluten Free Flour Blend (see Raspberry Scone Post)
1/8 teaspoon salt
3/4 cups cold butter, cut into chunks
3-6 tablespoons ice water

1. Place flour blend and salt in the bowl of a food processor and process for 5 seconds. Scatter the butter pieces over the flour, then pulse until the mixture resembles a coarse meal. Sprinkle with the water and process until dough starts to come together (but not until it forms a ball). Carefully take out the blade, and press the mixture together to pick up all the bits of dough. Flatten into a disk, wrap in plastic wrap, and refrigerate for at least 30 minutes before rolling and baking.


Recipe adapted from Family Fun Magazine


Hand Pie Apple Filling

2 tablespoons olive oil
1 onion, chopped
1 tablespoon butter
3-4 pink pearl apples or other tart variety like granny smith
2 tablespoons thyme, chopped
3/4 cup sharp white cheddar cheese, shredded
salt and pepper to taste

1. In a large skillet, heat the olive oil. Add the onions to the oil and caramelize (leave stove top on medium-low heat, stirring occasionally, until golden brown). Transfer onions to a bowl.
2. In the same skillet, melt the butter and saute the apples until they are slightly browned, but still firm. Add the thyme and cook for a couple more minutes.
3. Transfer the apples and thyme to the bowl with the onions and mix to combine. Season with salt and pepper and let the mixture cool. Toss in the cheddar cheese.


Assembling the Hand Pies

1. Preheat the oven to 350 degrees F. Take the pie dough out of the refrigerator and roll out on a lightly flour-dusted surface to make a thin sheet. Using a round cookie cutter or the rim of a bowl about 4 1/2 inches in diameter, cut out 8 circles of dough.
2. To make a pie, pile a small heap of apple filling on top of one circle, top with a second circle and press around the edges with a fork to seal. Poke the top of the pie with a knife or use a small cookie cutter to cut out a shape. After you make each pie place it on a parchment-lined baking sheet and keep in the refrigerator until ready to bake.
3. Bake the pies until they are golden-brown, about 20- 30 minutes.


Recipe from the kitchen of Cirque Du Souffle :)

Monday, September 10, 2012

Almond Macarons with Wild Strawberry Jam


I have never thought of September as the time of year for strawberries, but recently when I was at the farmer's market in Santa Fe, I bought the juiciest, sweetest little mountain strawberries I have ever had. I made this jam to preserve all of the bursting fresh flavor, and since I have been wanting to try making macarons again (the first time they were hollow, the second, they were too stiff and tiny), I knew the jam would make a perfect filling for them.


I always feel like such an amature baker when I compare myself to expert pastry chefs. Making macarons, I always think about a video I saw where chefs were skillfully piping out the macarons all exactly the same size, one after another. Each of my macarons are always one of a kind :) they vary alot in size and shape. But, hopefully, practice makes perfect, right?


On the days when I know I should be working or fulfilling other obligations, I can't help but constantly think up ideas for recipes I want to bake and photograph and post. I am constantly inspired- which can be both a good and bad thing. And I am afraid the autumn only makes it worse. There is too much unique produce to try!


Coming soon is a recipe I just tried with some very unusual apples. What is the most unique market find you have had recently?


Printable version of recipe:


Almond Macarons
makes about 3 dozen

1 cup confectioners' sugar
3/4 cup almond flour
2 large egg whites, room temperature
pinch of cream of tartar
1/4 cup superfine sugar

1. Pulse confectioners' sugar and almond flour in a food processor until combined. Sift mixture twice, then place in a bowl and keep in the refrigerator until ready to use.
2. Preheat oven to 375 degrees F. Whisk egg whites with an electric mixer on medium speed until foamy. Add cream of tartar, and whisk until soft peaks form. Reduce speed to low; add superfine sugar. Raise speed to high; whisk until stiff peaks form, 8 to 10 minutes. Sift flour mixture over whites; fold thoroughly until mixture is smooth and shiny.
3. Transfer batter to a pastry bag fitted with a 1/4 inch plain round tip. Pipe rounds about 1 inch in diameter, 1 inch apart, onto parchment- lined baking sheets. As you release, sweep pastry tip to sides of rounds rather than forming peaks. Tap bottom of each sheet to release trapped air. Let stand at room temperature until tops are dry to the touch, about 15 minutes. Place 1 sheet in oven. Reduce oven temperature to 325 degrees F.
4. Bake, rotating half way through, until crisp and firm, 10 to 12 minutes. After each batch, raise oven temperature to 375 degrees F, heat 5 minutes, then reduce to 325 degrees F just before next batch.
5. Let cookies cool completely on sheets, then transfer to a wire rack. Use an offset spatula to release cookies. (Unfilled cookies can be stacked between layers of parchment in an airtight container, and stored at room temperature up to 2 days).

I used this recipe from Martha Stewart Holiday Cookies because it seems very simple to follow and it has been the most reliable macaron recipe I have tried.


Wild Strawberry Jam
makes 1 3/4 cups

1 quart hulled wild strawberries
1/2 cup sugar
2 tablespoons fresh lemon juice

In a food processor, process strawberries until coarsely chopped. Transfer to a large skillet and stir in sugar and lemon juice. Cook over medium- high, stirring frequently, until jam is thickened and bubbles completely cover surface, 9 to 10 minutes. Transfer jam to a jar and let cool to room temperature. (To store, seal jar and refrigerate, up to 10 days).

Recipe from Martha Stewart Online


Almond Macarons with Wild Strawberry jam

Sandwich 1 teaspoon of jam between two cookies. Eat soon after assembling!